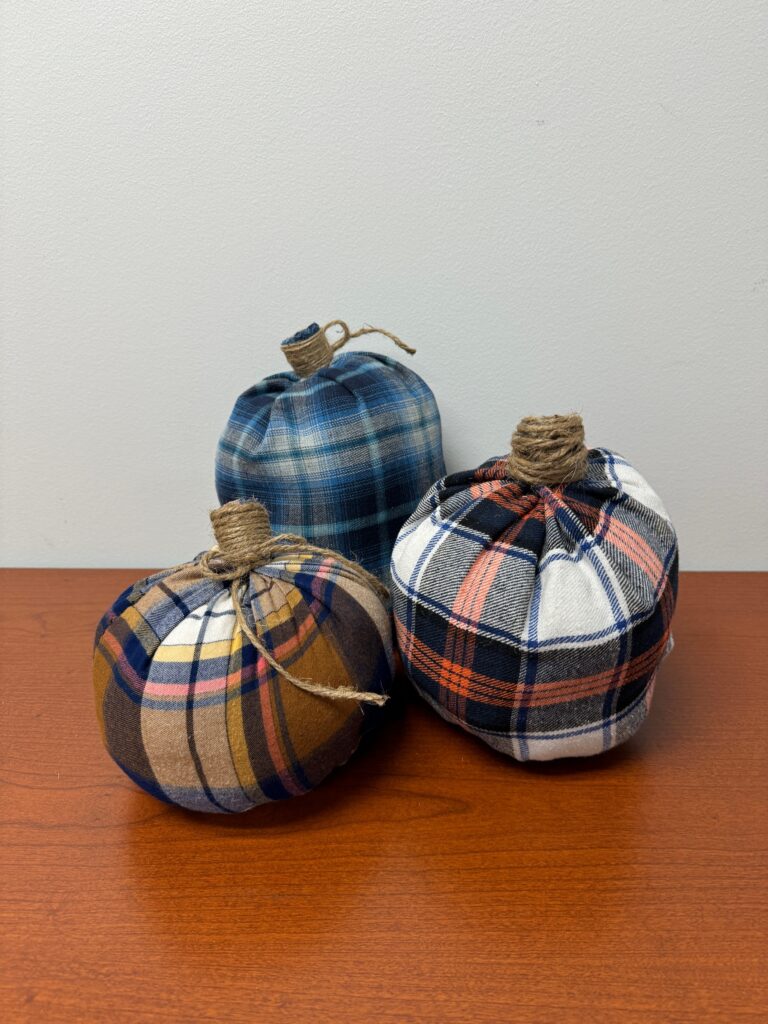
Upcycle Flannel Shirts into Decorative Pumpkins

As the leaves turn and the air gets crisp, it’s the perfect time to embrace the spirit of autumn with some DIY decor. One of the most charming projects you can tackle is making a flannel pumpkin, with a flannel shirt from Goodwill! Not only do these pumpkins add a cozy touch to your home, but they’re also incredibly easy and fun to make — and sustainable too! Here’s a step-by-step guide to crafting your very own flannel pumpkin!
What You’ll Need
Materials:
- Flannel fabric (in your choice of colors and patterns)
- Cotton batting or stuffing
- Scissors
- Needle and thread (or a sewing machine)
- Twine or ribbon (for the stem)
- Fabric marker or chalk (optional)
- Hot glue gun (optional)
Tools:
- Sewing pins (optional)
- Measuring tape or ruler
Step-by-Step Instructions
1. Choose Your Fabric
Pick out your favorite patterned flannel shirt, size L, from your local Goodwill store. You can go for classic fall colors such as orange, plaid or even a soft white for a modern touch.
2. Cut the Fabric
Turn fabric inside out and cut a square from the fabric. The size can vary depending on how big you want your pumpkin, but 12×12 inches is a good start.
3. Fold the Fabric in Half
Leaving the fabric inside out use hot glue or sew about ¼ inch in for the raw edge to create a hem. Set aside to dry completely according to bottle – this will create a sleeve of fabric leaving the raw edge inside.
3. Whip Stitching an End of the Sleeve
Once dry or sewn, double thread a hand sewing needle about an arm’s length of thread. Knot the ends of the thread to be the size of the needle or bigger to avoid seems from popping later.
Starting at the left (either end will work) of the hem, begin to weave the needle and thread completely around the diameter of the fabric approximately ¼ inch from the raw edge. Once all the way around the edge, pull the thread tightly and tie it to secure.
4. Stuff your Pumpkin
Using poly fill, stuff the pumpkin, packing the sides and middle. Once you pumpkin is full to your liking, you will repeat Step 3.
5. Making the Stem
After you have repeated Step 3 on the open end, you’ll tie twin around the secured fabric and tie a bow. Gather the access fabric, and hot glue a string of twine at the knot of the bow. Once dry, you’ll begin to wrap the twine around the fabric until you’ve created the stem at your desired length. Hot glue the end of the twine string down and cut off the access fabric.
6. Shape the Pumpkin
To give your pumpkin that iconic pumpkin shape, take a length of twine or ribbon and wrap it around the middle of your stuffed fabric, pulling tight. This will create the pumpkin’s sections. Tie it securely. This part is optional but is a cute addition.
6. Finishing Touches
If you’d like to personalize your pumpkin, consider adding embellishments such as a small bow, dried leaves or a fabric leaf sewn onto the side.
7. Display Your Creation
Now that your flannel pumpkin is complete, find the perfect spot to display it! Whether it’s on a mantle, a dining table centerpiece or mixed in with your other fall decorations, it’s sure to add warmth and charm to your space.
Making a flannel pumpkin is a delightful way to celebrate the autumn season. It’s a simple craft that can be customized to fit your style, and it’s a great project to enjoy with friends or family – while giving back to Goodwill’s many missions programs. So, grab your supplies, turn on your favorite fall playlist and get crafting! Happy autumn!